
Standing at your back window and staring out into a chaotic, tangled jungle of invasive vines, towering weeds, and neglected branches can feel incredibly overwhelming. What should be a relaxing outdoor retreat has instead morphed into a daunting source of stress, harboring pests and blocking out the natural sunlight. It is easy to shut the blinds and ignore the problem, but reclaiming this space is one of the most rewarding home improvement projects you can undertake. A beautifully transformed outdoor space not only significantly boosts your property value but also provides a profound sense of mental well-being, giving you a private sanctuary to unwind, entertain, and reconnect with nature.
Transforming a deeply neglected yard is not a weekend project; it is a multi-phase journey that requires strategic planning, physical exertion, soil rehabilitation, and thoughtful replanting. Attempting to tackle the entire jungle at once without a clear roadmap is a recipe for exhaustion and burnout. Instead, approaching the transformation in systematic phases allows you to steadily conquer the chaos.
By breaking the work down into manageable steps—from the initial assessment and heavy clearing to the final touches of hardscaping and planting—you can systematically turn your overgrown property into the oasis you have always envisioned. This comprehensive guide will walk you through every step of that journey, ensuring you have the knowledge and strategies needed to reclaim your land.
Phase 1: Assess the Chaos and Create a Master Plan

Before you even think about starting a chainsaw or swinging a machete, you need a comprehensive battle plan. Rushing into an overgrown yard without a clear strategy often results in destroying valuable plants, damaging hidden utilities, or creating a disjointed layout.
Map Out Existing Features and Desired Zones
Start by taking a walk through the property, going as far back as the overgrowth allows. Bring a clipboard, graph paper, and a tape measure. Your goal is to sketch out the yard’s boundaries and identify what elements are worth saving. Do you have mature oak trees providing excellent shade? Is there an old stone retaining wall hidden beneath the ivy? Mark these on your map.
Next, define the zones you want to create in the future. Consider how you intend to use the space:
-
Entertainment Zones: Areas designated for patios, fire pits, or outdoor dining.
-
Active Zones: Open lawn spaces for children or pets to play.
-
Garden Zones: Raised beds for vegetables, or border gardens for ornamental flowers.
-
Utility Zones: Hidden spaces for compost bins, tool sheds, and HVAC units.
Identify Dead, Diseased, or Hazardous Growth
Once you have a rough map, you must evaluate the health of the existing vegetation. Overgrown yards are often battlegrounds where invasive species have choked out native plants. You will need to identify which large plants are dead, diseased, or posing a structural threat. Look for warning signs such as deep cracks in trunks, extensive fungal growth (like shelf mushrooms) at the base of trees, or large branches that are completely devoid of leaves during the spring and summer.
For a proper health assessment of your mature, foundational vegetation, it is highly recommended to consult certified arborists. They can accurately diagnose diseases that might be invisible to the untrained eye and tell you which mature specimens are structurally sound enough to build your new landscape around. Furthermore, gathering initial quotes from local tree services during this early planning phase will help you establish a realistic budget for the heavy clearing that lies ahead, preventing any financial surprises down the road.
Table: Quick Reference for Plant Health Assessment
| Visual Sign | Potential Issue | Recommended Action |
| Peeling bark on main trunk | Fungal infection or dying cambium layer | Flag for professional inspection or removal. |
| Shelf mushrooms at the base | Advanced internal wood rot | High risk of falling; prioritize for immediate removal. |
| Crossing/Rubbing branches | Poor structural growth | Mark for aggressive pruning to prevent bark damage. |
| Vigorous green growth at base only | Crown dieback (top of the plant is dead) | Often requires complete removal of the specimen. |
Phase 2: Safely Tackle Overhanging Limbs and Giant Trunks

With your master plan in hand, it is time to begin the physical transformation. The golden rule of clearing an overgrown property is to work from the top down. Tackling ground-level brush while hazardous, dead branches hang precariously overhead is a major safety risk.
Prioritize Falling Hazards and Structural Damage Risks
Your first priority must be addressing anything that threatens your home’s roof, overhead power lines, or neighboring property lines. Heavy, overhanging limbs that have grown unchecked for years can snap during storms, causing catastrophic damage. When dealing with large limbs, it is crucial to use the three-cut method to prevent the heavy branch from stripping the bark down the main trunk as it falls.
-
The Undercut: Make a shallow cut on the underside of the branch, about a foot away from the trunk.
-
The Top Cut: Make a complete cut through the branch from the top, slightly further out than the undercut. The branch will fall cleanly without tearing the trunk’s bark.
-
The Stub Cut: Carefully remove the remaining stub just outside the branch collar to allow the plant to heal properly.
Establish Clear Drop Zones for Heavy Debris
Before any major cutting begins, you must prepare the yard. Clear away any movable obstacles, such as old lawn furniture, birdbaths, or decorative rocks, that might be hidden in the tall grass. Establish clear “drop zones” where heavy limbs can safely fall without damaging the healthy vegetation you marked to save in Phase 1. Communicate clearly with anyone helping you, using a system of visual or auditory signals to ensure everyone is safely out of the way before a large cut is finished.
Depending on the scale of your overgrowth, the type of professionals you bring in can vary wildly. For massive, multi-acre properties heavily forested with towering timber, industrial tree loggers might be required, as they utilize heavy machinery like feller bunchers and skidders to clear land quickly. However, for a standard suburban backyard with complex access issues, residential tree removal companies are generally the better fit. They specialize in carefully dismantling large specimens piece by piece in tight spaces, ensuring your fence and your neighbor’s garage remain completely unharmed during the process.
Phase 3: Eradicate Invasive Underbrush and Stubborn Stumps
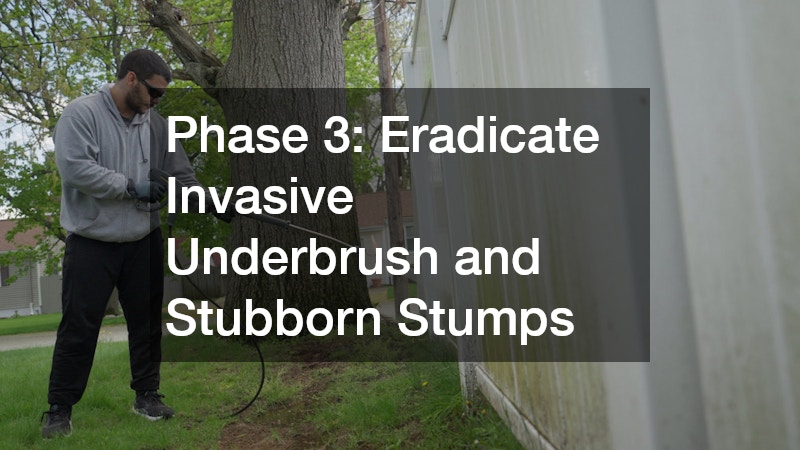
Once the overhead hazards are neutralized and the canopy is opened up, sunlight will finally hit the ground. Now you must tackle the dense, tangled underbrush, thorny vines, and the remnants of the trunks you just took down.
Rent the Right Brush Clearing Equipment for the Job
Clearing years of neglected brush by hand with pruning shears is nearly impossible. Renting the right heavy-duty equipment will save your back and weeks of manual labor.
-
Walk-Behind Brush Mower (Brush Hog): Ideal for tearing through saplings, thick weeds, and dense thickets of blackberry bushes. It functions like a heavy-duty lawnmower on steroids.
-
Heavy-Duty String Trimmer: Equipped with a metal brush blade rather than a nylon string, this tool is perfect for clearing tough stalks along fencelines and around the bases of larger plants.
-
Chainsaw: Essential for cutting down thicker saplings and processing fallen limbs into manageable firewood or debris piles.
Always wear comprehensive safety gear when operating this machinery. This includes steel-toed boots, thick canvas pants or chaps, heavy leather gloves, safety goggles, and hearing protection. Hidden hazards like old wire fencing, rocks, or glass bottles are often concealed in thick underbrush and can become dangerous projectiles.
Grind Stumps to Prevent Regrowth and Pests
After cutting down unwanted vegetation, you will be left with an obstacle course of stumps. Leaving stumps to rot naturally is generally a bad idea for a transformed yard. Not only are they tripping hazards and lawnmower-ruiners, but decaying wood acts as a massive magnet for subterranean termites, carpenter ants, and wood-boring beetles—pests you definitely do not want near your home’s foundation. Furthermore, many invasive species will simply aggressively sprout new growth from a freshly cut stump if the root system is left intact.
To clear the way for a smooth, usable lawn or garden bed, mechanical stump grinding is necessary. This process uses a powerful rotating cutting disk to chew the wood down several inches below the soil grade. If you contracted out your major overhead clearing, bundling the stump grinding with your primary tree removals can often secure a significantly discounted overall rate. It is highly advisable to get at least three separate, itemized bids from a local tree removal service to ensure you are getting fair, competitive pricing for this messy but vital cleanup phase.
Phase 4: Grade the Land and Rejuvenate the Soil
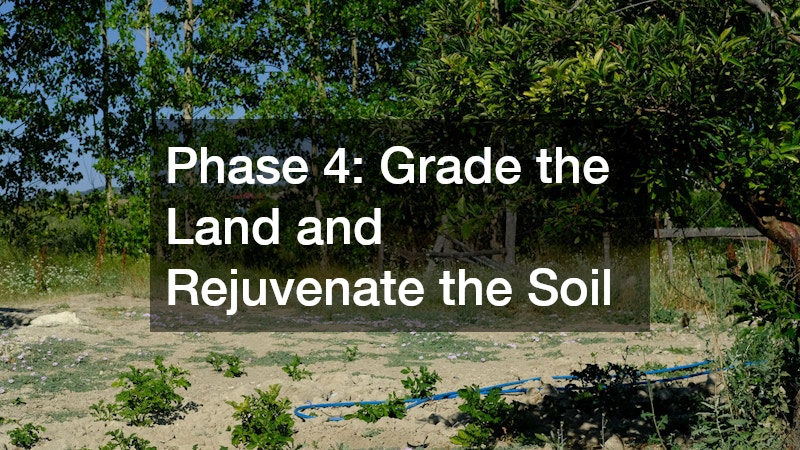
With the jungle cleared and the stumps ground into sawdust, your yard will likely look like a barren, uneven construction site. This is completely normal. Before you plant a single flower or lay a single paver, you must fix the bones of the yard: the grading and the soil health.
Establish Proper Drainage Away from the Foundation
Years of unchecked root growth and natural soil erosion can drastically alter the topography of your property. Walk the perimeter of your house and visually inspect the slope. The ground must pitch away from your foundation to prevent water from pooling against your basement walls or crawlspace during heavy rains. A standard rule of thumb is a drop of at least six inches for the first ten feet away from the house.
If your yard slopes toward your home, you will need to bring in clean fill dirt and topsoil to re-grade the land. Use a landscape rake to smooth out the new soil, tamping it down firmly. For areas with severe water pooling issues, this is the time to dig trenches and install French drains or surface swales to safely redirect storm runoff toward the street or a designated drainage ditch.
Test the Soil pH After Years of Neglect
Soil that has been buried under a thick mat of decaying organic matter, pine needles, and invasive roots for years is rarely in optimal condition. It is often highly acidic, severely compacted, or completely depleted of essential macronutrients like Nitrogen, Phosphorus, and Potassium (NPK).
Purchase a comprehensive soil testing kit from your local nursery or send a sample to your local university’s agricultural extension office. The results will tell you exactly what your soil needs.
-
If the soil is too acidic (low pH): You will need to broadcast agricultural lime to raise the pH.
-
If the soil is too alkaline (high pH): You will need to apply elemental sulfur or peat moss.
-
If the soil is compacted and nutrient-poor: Till in a generous layer of rich, organic compost to improve aeration, water retention, and microbial life.
If you preserved any valuable, mature oaks or maples during the clearing phase, their root systems likely suffered some stress during the heavy equipment operation. Consider hiring a specialized tree care company to apply deep-root liquid fertilizer to help these saved specimens recover and thrive in their newly opened environment. Additionally, if you used contractors for the clearing phase, asking those tree removal services to leave the shredded wood chips behind on your driveway is an excellent, entirely free way to source bulk mulch for top-dressing your newly rejuvenated soil beds.
Phase 5: Plant Strategically and Install Hardscaping
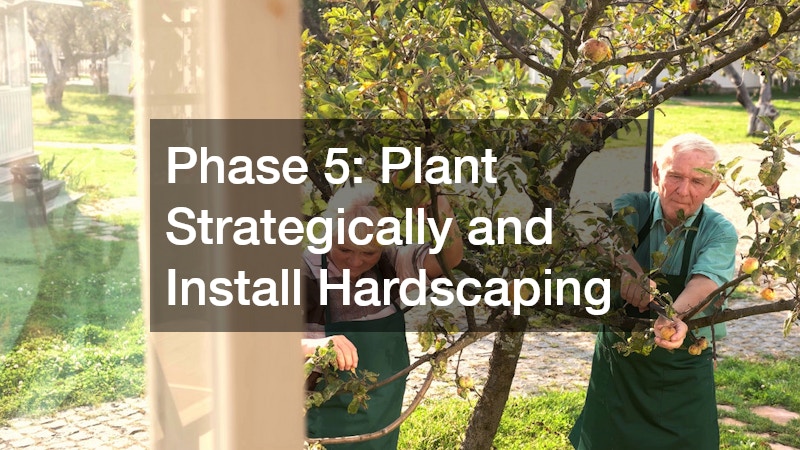
The final phase is where your original vision finally comes to life. The heavy lifting is done, the soil is prepped, and you have a blank canvas ready for transformation.
Lay Down Weed Barriers and Edging First
Nature abhors a vacuum. If you leave your freshly cleared, nutrient-rich soil bare, the invasive weeds and vines you just fought so hard to eradicate will return with a vengeance within weeks. You must establish control immediately.
For areas designated as garden beds or decorative rock features, start by laying down a commercial-grade, woven geotextile weed barrier. Overlap the seams by at least six inches and pin the fabric securely into the soil using landscape staples. Next, install robust edging to permanently define the borders between your lawn, your garden beds, and your pathways. Materials like flexible steel edging, poured concrete curbing, or heavy stone blocks provide a clean, manicured look while preventing grass roots from creeping into your flower beds.
Select Native Plants for Low-Maintenance Brilliance
When it comes time to replant, resist the urge to buy delicate, exotic species that require constant pampering. The secret to a beautiful, low-maintenance outdoor property is utilizing native plants. Native species have evolved specifically for your region’s unique climate, rainfall patterns, and soil types. Once established, they are incredibly hardy, highly resistant to local pests, and require a fraction of the watering and chemical fertilizers that non-native species demand.
Research your specific USDA Hardiness Zone and select a diverse mix of native evergreen shrubs for year-round structure, perennial flowers for seasonal pops of color, and ornamental grasses for texture and movement.
Install Hardscaping Elements
Hardscaping refers to the non-living elements of your yard—patios, walkways, fire pits, and retaining walls. These features anchor the space and dictate the flow of foot traffic. For simple DIY projects like laying a gravel pathway or building a small, dry-stacked fire pit ring, meticulous leveling and a proper compacted base layer (like crushed gravel and leveling sand) are crucial to prevent settling over time.
However, certain hardscaping tasks require precision engineering and specialized heavy equipment. Knowing when to transition from a DIY warrior to a project manager is key to a successful transformation. For complex, large-scale tasks like pouring a stamped concrete patio, installing a paver driveway, or building structural retaining walls to hold back tons of soil, it is highly recommended to hire professional landscape services. Take the time to properly vet any landscaping company you consider; ask for a portfolio of past backyard renovations, verify their licensing and insurance, and ensure their design aesthetic aligns with the master plan you created way back in Phase 1.
Enjoying Your Reclaimed Sanctuary
Transforming a deeply overgrown, neglected property into a functional and beautiful outdoor living space is a marathon, not a sprint. It demands patience, physical effort, and a willingness to get your hands dirty. From the initial daunting assessment and the strategic clearing of massive hazards to the meticulous grading of the soil and the final joyful planting of native flora, every single step you take reclaims a piece of your home.
Throughout this grueling but rewarding process, make sure to take plenty of progress photos. When you are sweating through the brush-clearing phase or hauling wheelbarrows of compost, it is easy to lose sight of how far you have come. Looking back at the “before” pictures will give you the motivation needed to push through to the finish line. Once the final paver is set and the last plant is watered, you have earned the right to pour yourself a cold drink, sit back in your newly conquered backyard sanctuary, and finally enjoy the peaceful, beautiful outdoor oasis you built from the ground up.